Mastering the Art of Industrial Motor Rewinds
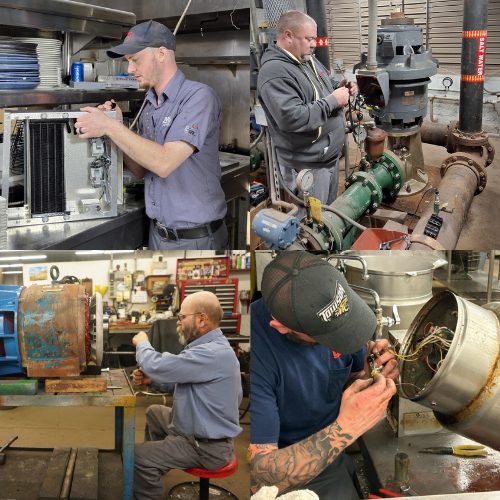
Industrial motors are the lifeblood of many operations, driving machinery and processes essential to production and to our daily lives. These motors drive the elevator you ride in at your office building, the escalator at the airport, the printing press for your local newspaper, manufacturing machinery for everyday products like paint, plastics, food ingredients, medicine, and key equipment like cranes on construction sites which build and maintain the infrastructure in your city and erect commercial buildings like hospitals, libraries, and schools.
Like any mechanical device, they can experience wear and tear over time. Motors can suffer from insulation failure, overheating, contamination, and electrical faults. Rewinding is a cost-effective solution to restore a motor’s performance and extend its lifespan, ensuring minimal downtime and operational efficiency. One key maintenance task that ensures their longevity and efficiency is motor rewinding. Here, we’ll explore the process of industrial motor rewinds, step-by-step.
Step 1: Initial Inspection and Testing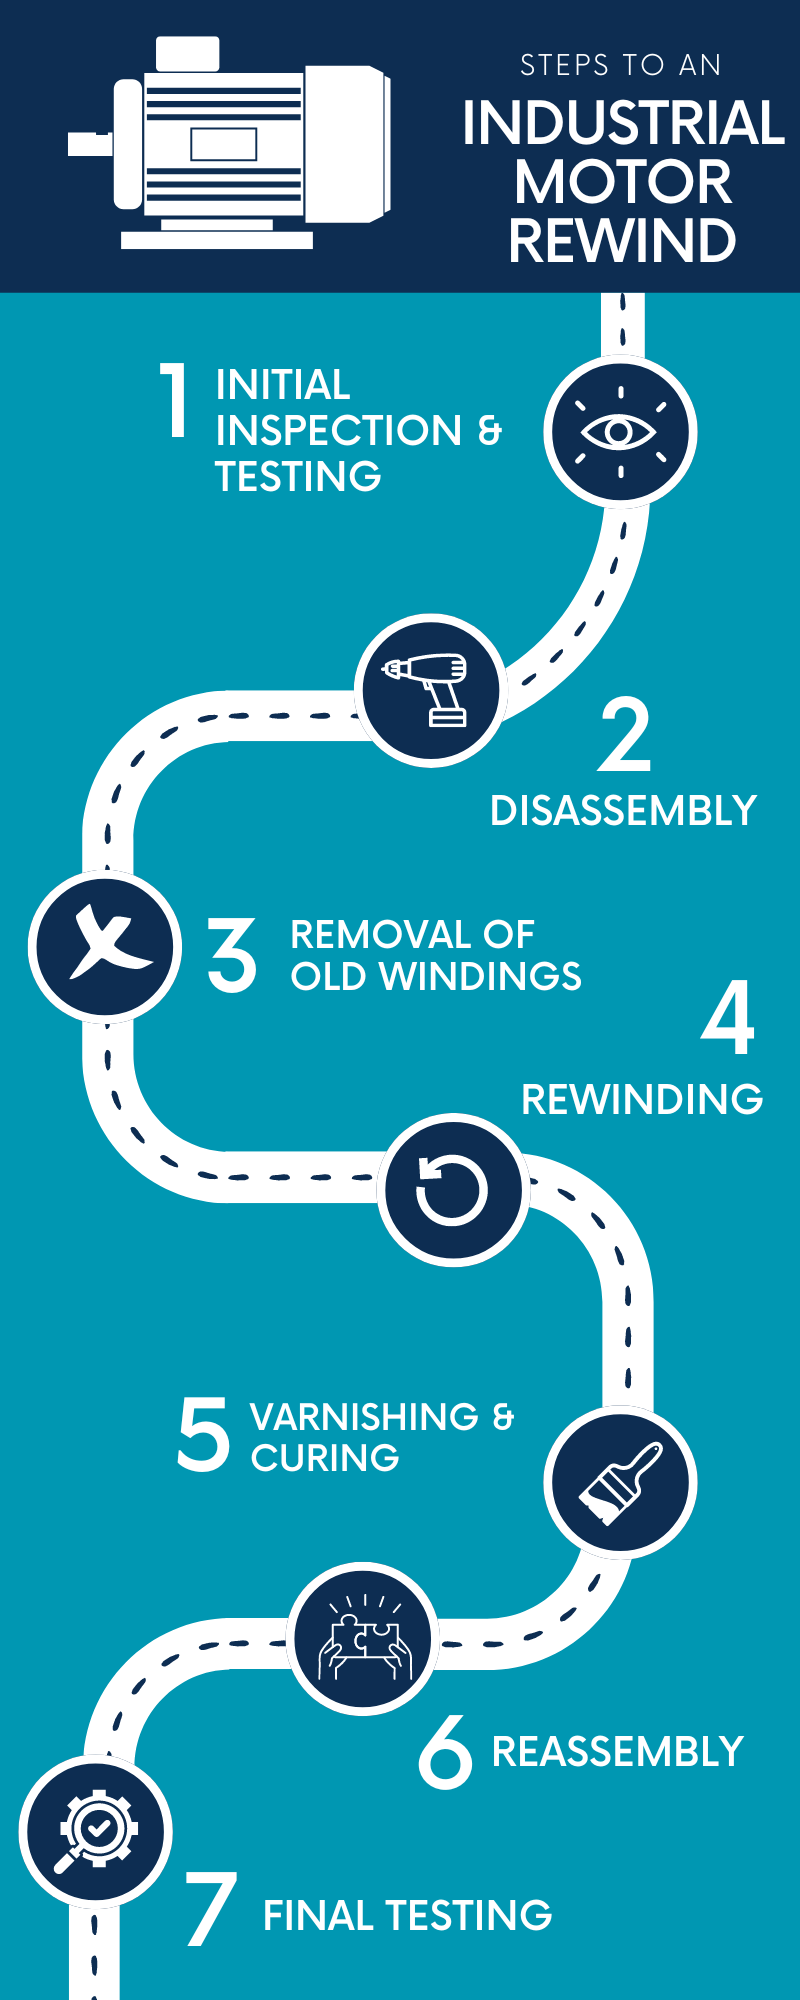
Before any work begins, a thorough inspection and testing of the motor are crucial.
- Visual Check: Look for visible damage or contamination.
- Electrical Testing: Use tools to check electrical integrity.
- Performance Check: Run the motor to identify problems.
Step 2: Disassembly
Once the initial inspection is complete, the motor is carefully disassembled.
- Remove End Bells: Take off covers to access rotor and stator, check running fits and bearing journals/growl rotor for openings.
- Extract Rotor: Remove to reach stator windings.
- Label Parts: Ensure easy reassembly.
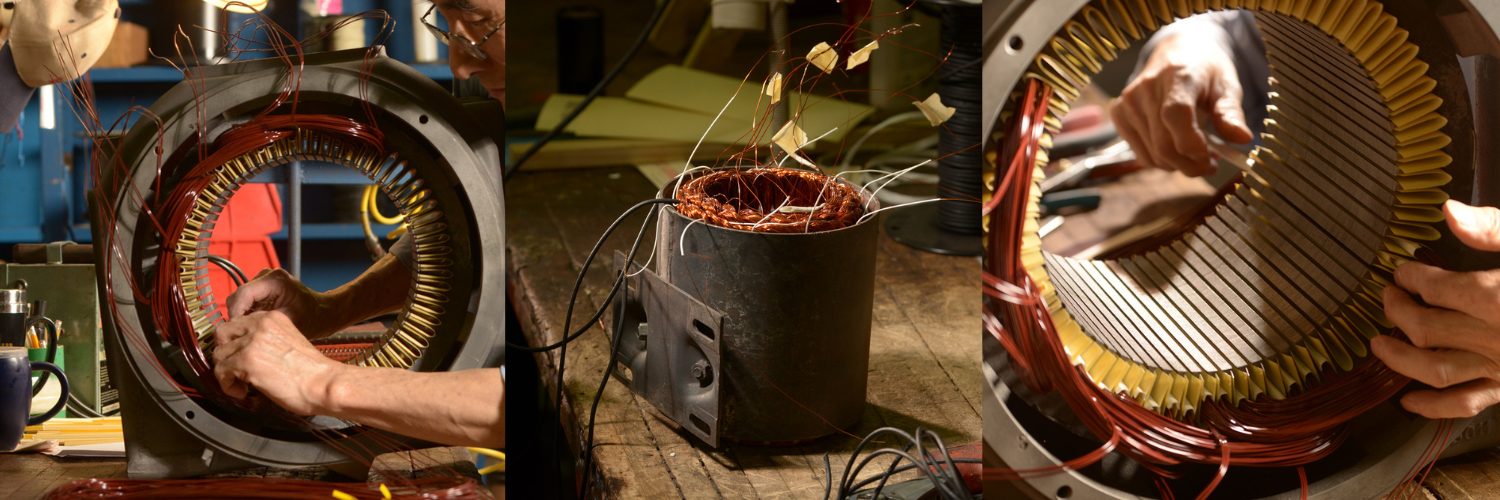
Step 3: Removing Old Windings
With the motor disassembled, the old windings need to be measured and removed.
- Take Measurements: Measure the coil extension and lead length.
- Cut and Burn: Winding data must be taken to determine the speed (RPM), the number of connection wires in multiples and size/turns per coil and pitch.
- Remove Windings and Clean Stator: Carefully take out the old windings and use solvents to remove old insulation and contaminants.
Step 4: Rewinding
Time for the core of the process.
- Insulate Stator: Apply new insulation to prevent electrical faults.
- Wind New Coils: Use precise techniques to wind new coils.
- Secure Windings: Ensure even distribution and balance.
- Electrical Testing: Once winding is complete, extensive electrical testing must be done, such as:
- AC Hipot @ 2000V
- Sure test @ 2000V
- Phase Balance to make sure the polarity is good and the current is balanced
Step 5: Varnishing and Curing
Protect the new windings and enhance the motor’s durability.
- Apply Varnish: Dip stator in varnish for protection.
- Bake: Cure in oven for varnish to set.
- Clean: Fits and bore.
Step 6: Reassembly
With the windings in place and cured, the motor is ready to be reassembled.
- Reinstall Rotor: Place back into stator.
- Secure End Bells: Attach covers and align components.
- Check Fit: Ensure parts fit and motor spins freely.
Step 7: Final Testing
After reassembly, the motor undergoes a series of final tests to ensure it operates correctly.
- Electrical and Performance Tests: Check for continuity, insulation, and performance under load.
- Vibration Analysis: Verify no imbalance or issues.
Motor rewinding is crucial for maintaining motor efficiency and longevity. By following these steps, skilled technicians can ensure motors perform optimally, minimizing disruptions and maximizing productivity in industrial settings.